Create your own macrame yarn wall hanging
Ready to get your macrame on?!
Our Macrame Yarn Wall Hanging Kit for 2 comes standard in our Mom + Daughter Connection Kit and provides a fun way for moms and teen daughters to make memories — and a DIY craft — together.
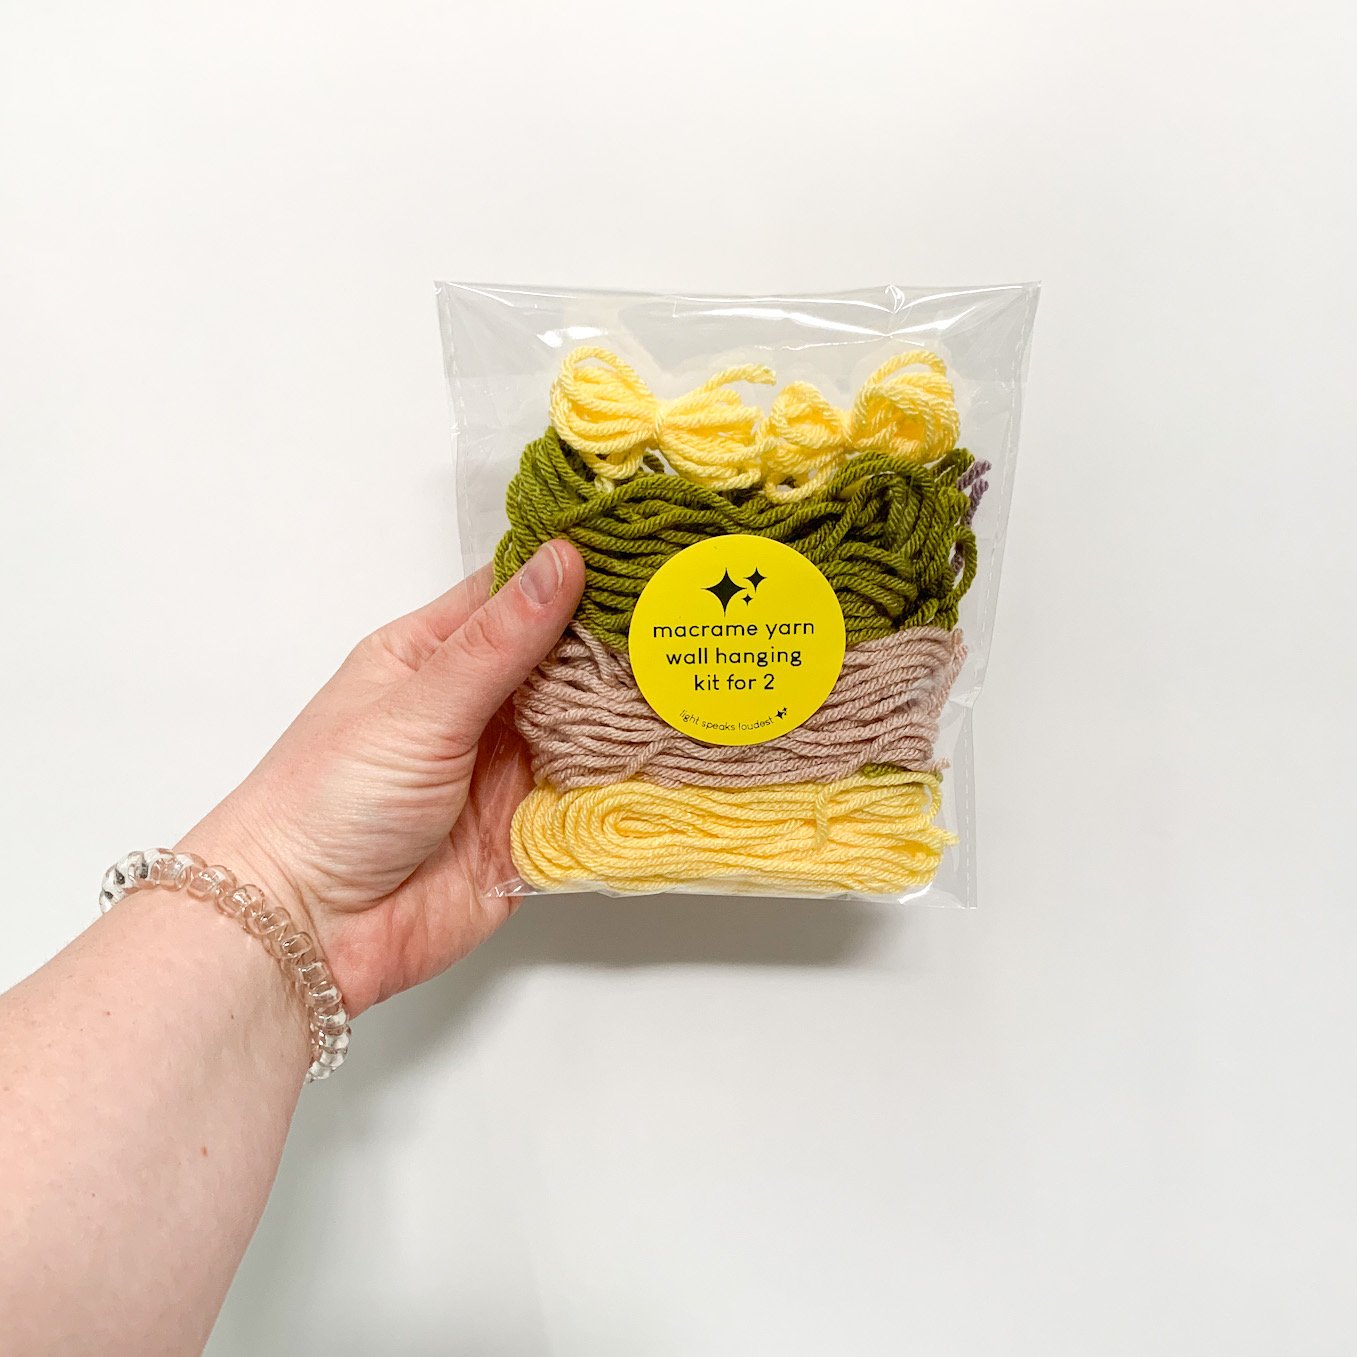
Each yarn kit has enough materials to make 2 wall hangings so you don’t even have to share. 😉
Follow these simple instructions and you’ll be on your way to making a beginner-friendly macrame wall hanging that’ll brighten up any space you’ve got!
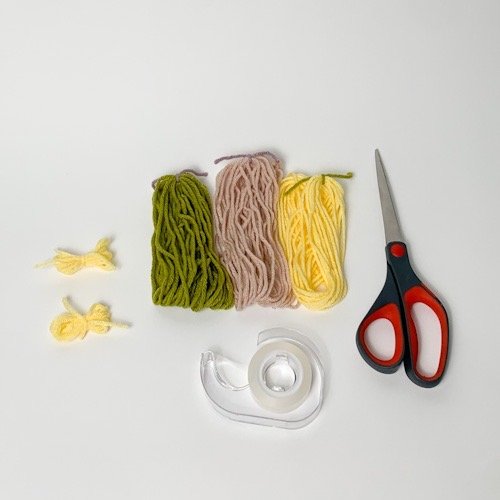
Materials needed:
Macrame Yarn Wall Hanging Kit for 2 from Light Speaks Loudest, which includes:
2 pre-cut base yarns
24 pre-cut hanging yarns (8 pieces in 3 colors)
tape (clear or washi works well)
scissors
Instructions:
Step 1
Gather your materials. :)
Step 2
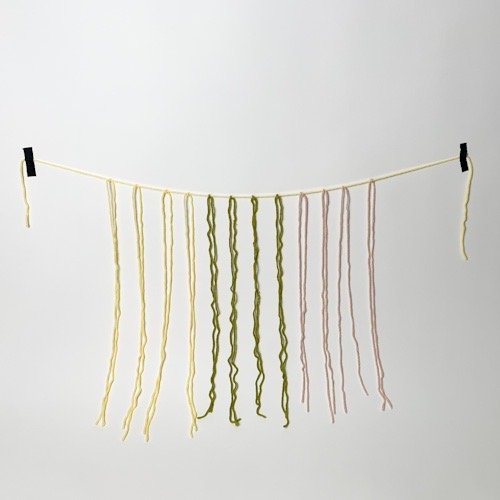
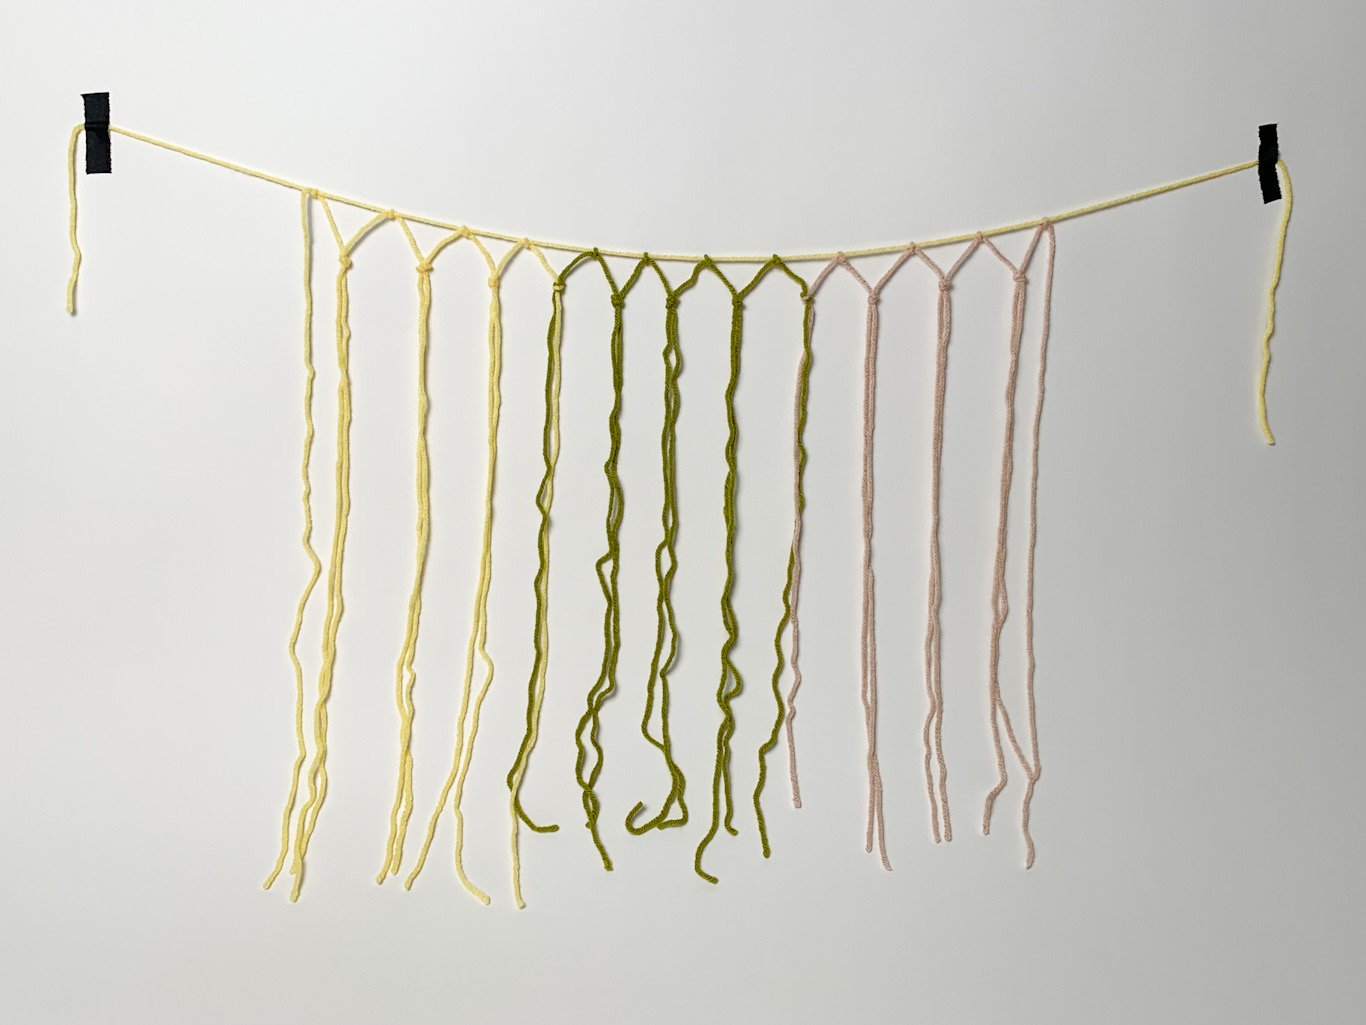
Find the 2 base yarns in your kit and lay them flat on a table before taping each end. (The base yarns are the 2 pieces of yellow yarn tied separately from the rest of the hanging yarns).
Sidenote: If it’s easier, you can use tape or pushpins to hold the ends of the base yarn to your wall and create your wall hanging already in place.
Step 3
For each wall hanging, gather 4 hanging yarns in each color (12 hanging yarns total). Use single knots to attach these yarns to the base yarn about 1-2 inches apart. Have fun with the colors and arrange them in whatever order gives you joy!
When you’ve finished your first row of knots, your wall hanging should look something like this:
Step 4
Now, let’s tie your second row of knots. Skip the hanging yarn on the end for now, and then tie the next 2 hanging yarns together using a double knot to make a triangle shape, like this:
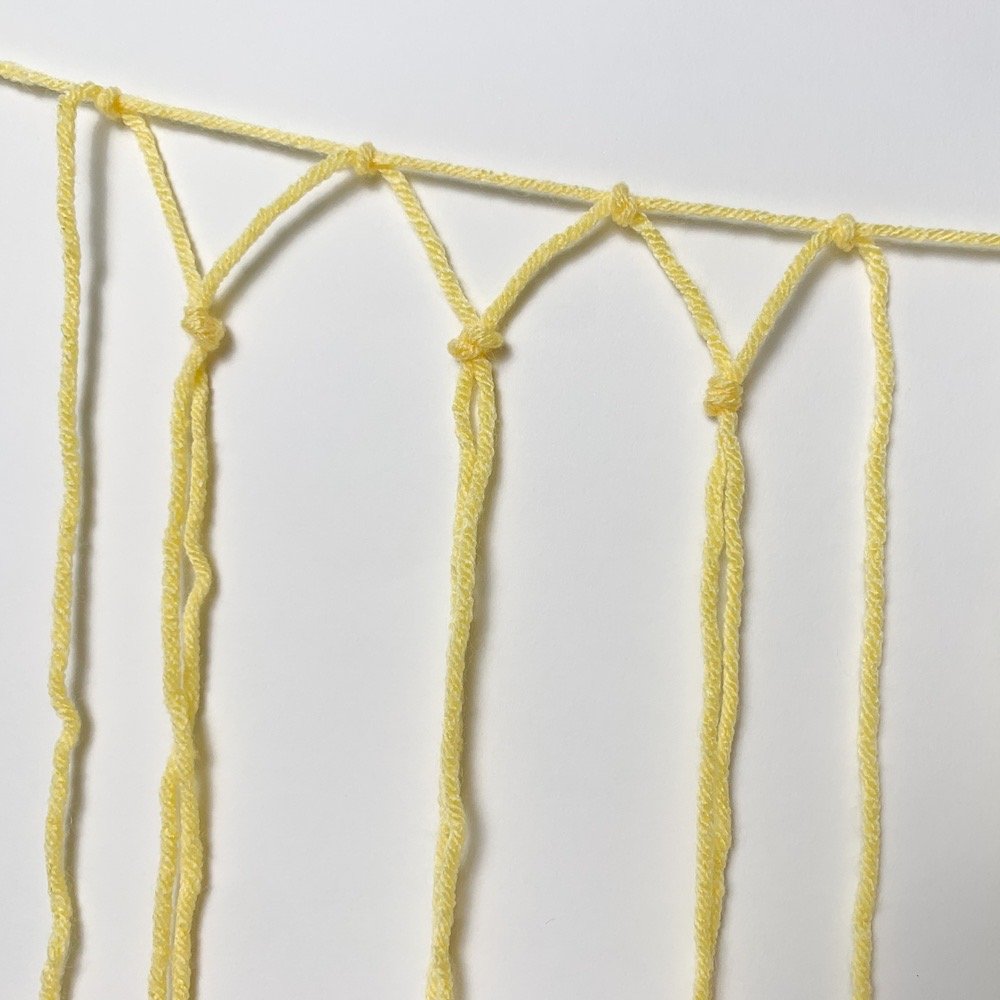
Repeat this process until you get to the end of the row.
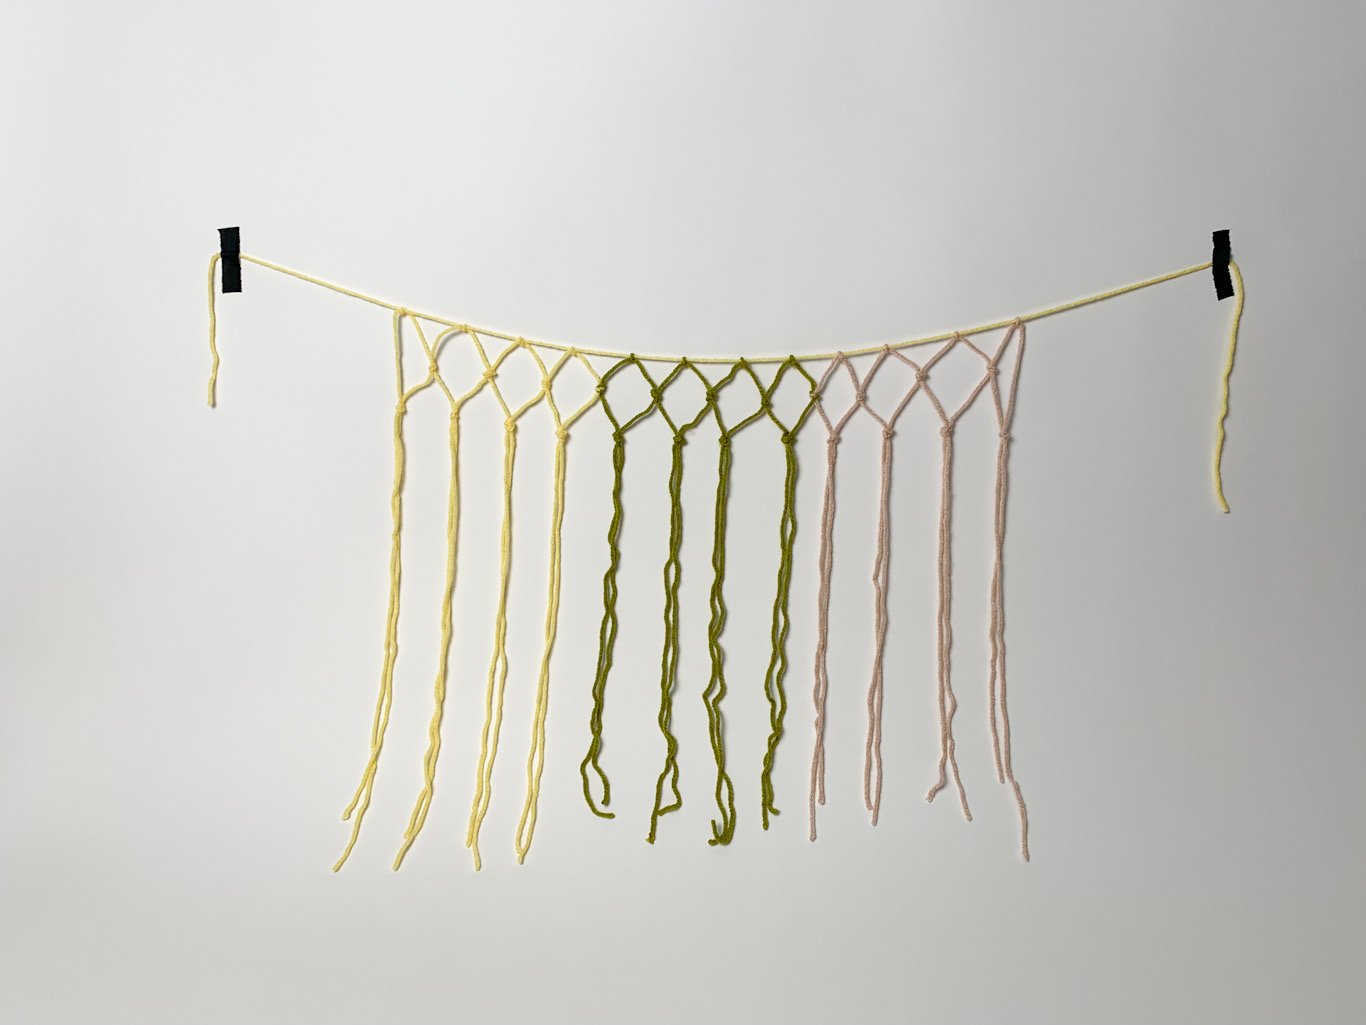
Step 5
Now it’s time to start your next row of knots. Begin by taking the hanging yarn on the end that you skipped during the last step, and tie it to the hanging yarn next to it.
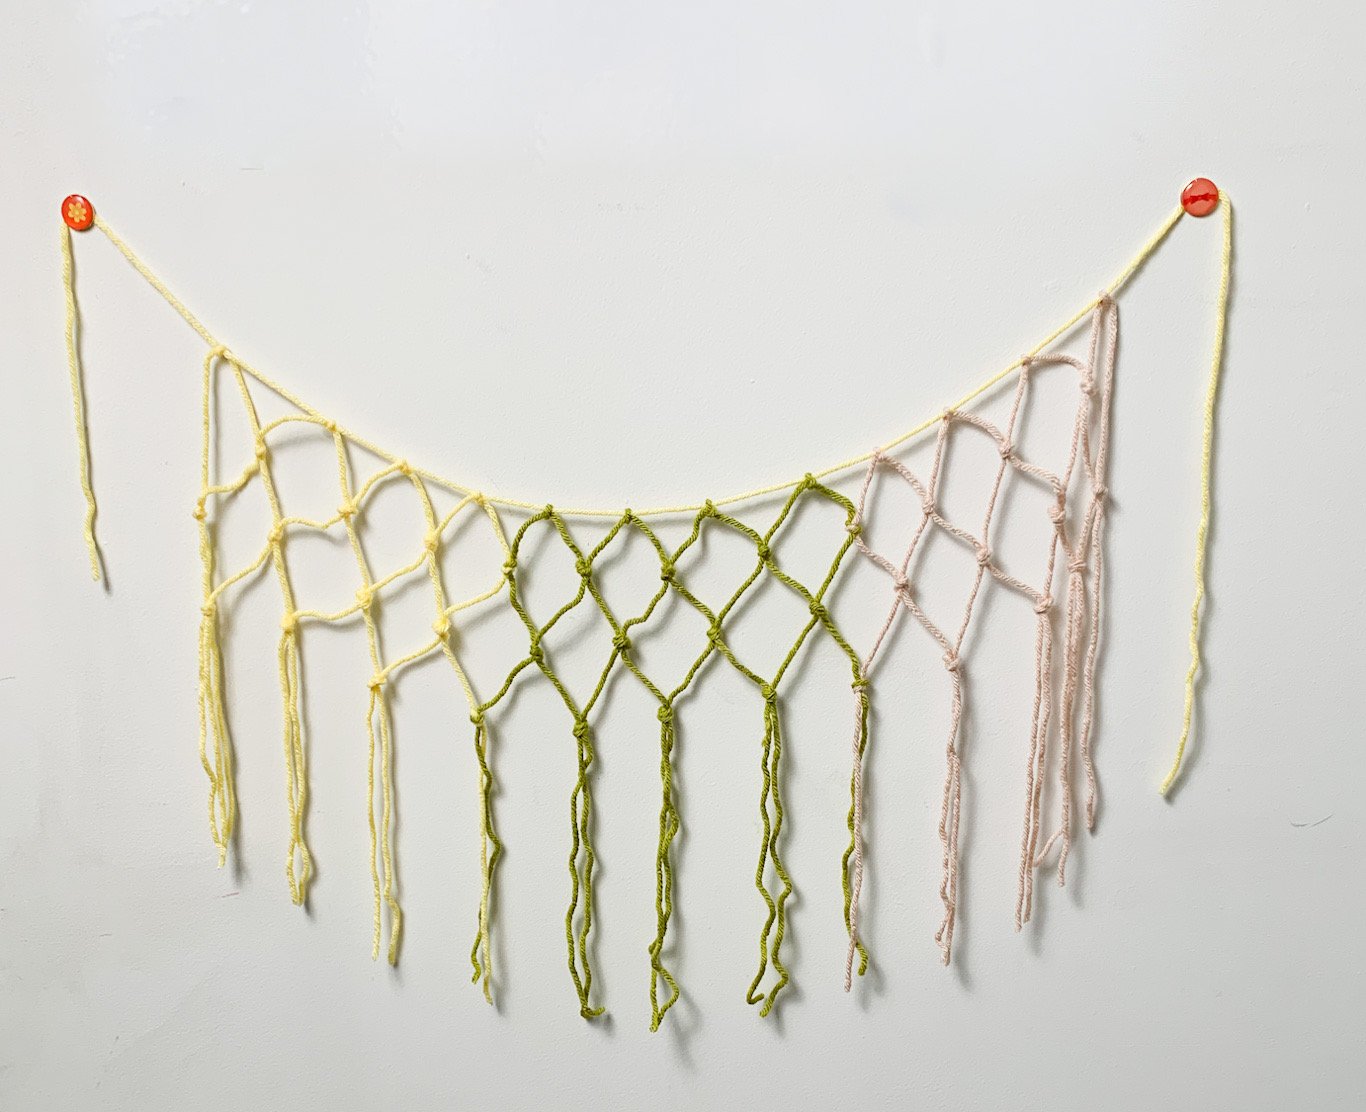
Continue working your way from left to right, tying your third row of knots. You should see your wall hanging yarns start to make a diamond pattern like this:
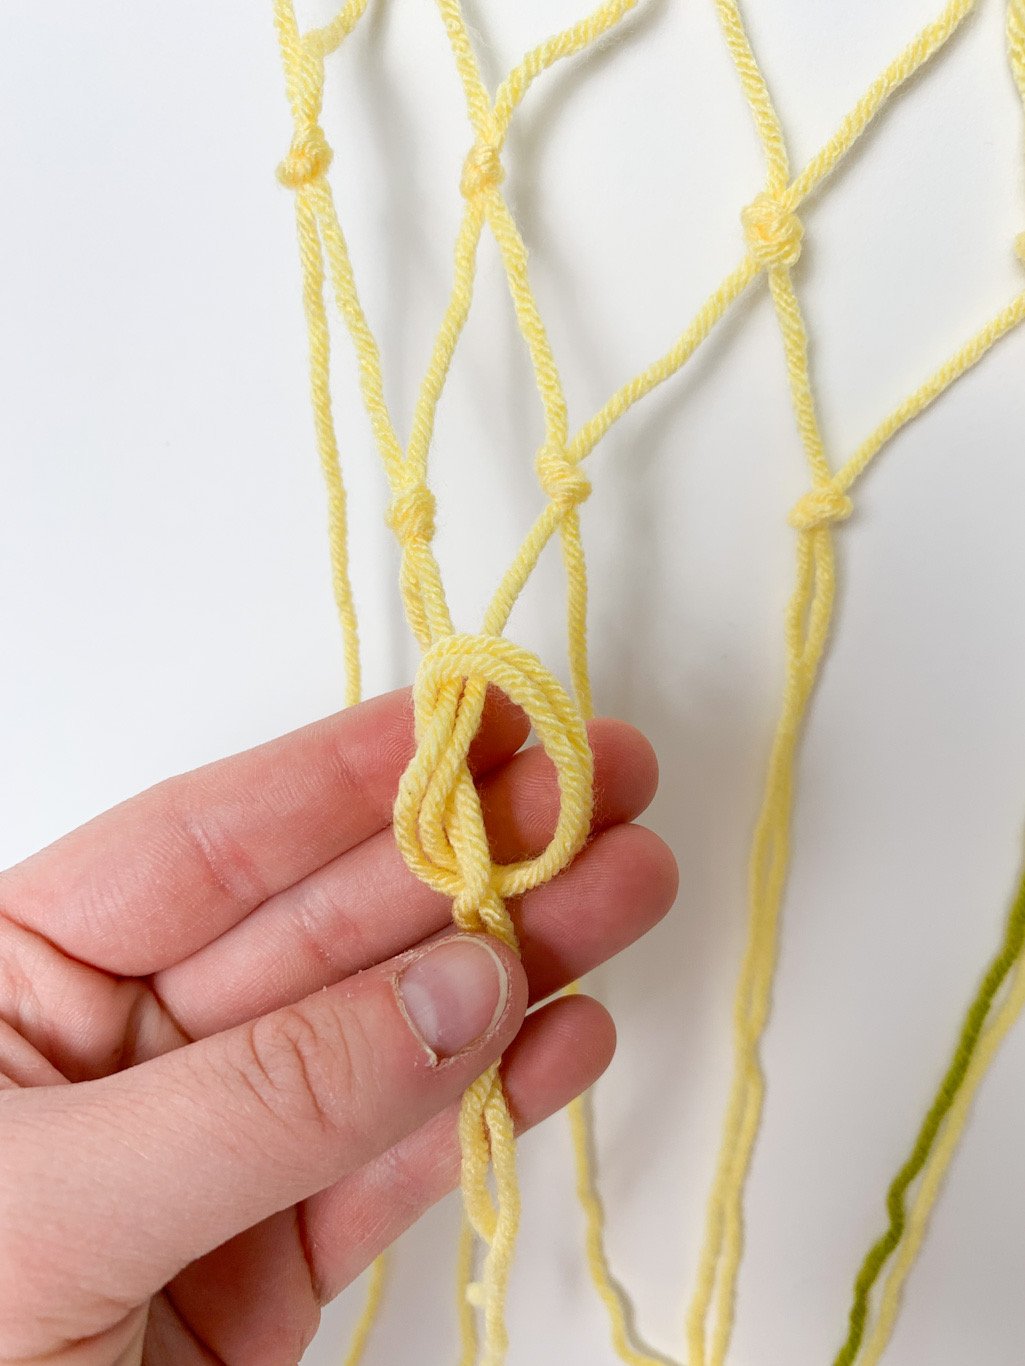
Here’s a lil close-up of the double knot tying technique that worked best for me!
Step 6
Repeat this process of making knot rows for as many additional rows as want!
I made my macrame wall hanging with 4 rows total because I liked having some fringe at the bottom.

Step 7
Use your scissors to trim the hanging yarn fringe as desired, and you’re done!
You can now hang your masterpiece up on your wall using pushpins or try tape / command hooks if you want to avoid putting holes in your wall.
Enjoy! :)